Understanding Heat
Stop treating the burner dial like an exact answer. Learn to watch, listen, smell, and adjust.
- Heat control
- Pan preheating
- Browning
- Troubleshooting
Learn It
Low, medium, and high are directions—not precise temperatures.
Burners have different power. Gas responds quickly, electric coils hold heat after the dial changes, and induction can move very fast. A heavy pan warms slowly and holds heat; a thin pan reacts quickly and may develop hot spots. Cold food also pulls heat from the pan.
Preheating gives the pan time to reach a useful, even temperature. But the setting that gets you there may not be the setting that finishes the food.
See It: Read the Cues
Use several senses. One cue alone rarely tells the whole story.
Too low, just right, too high
Use the same ingredient, pan, portion, and camera angle so heat is the only meaningful change.
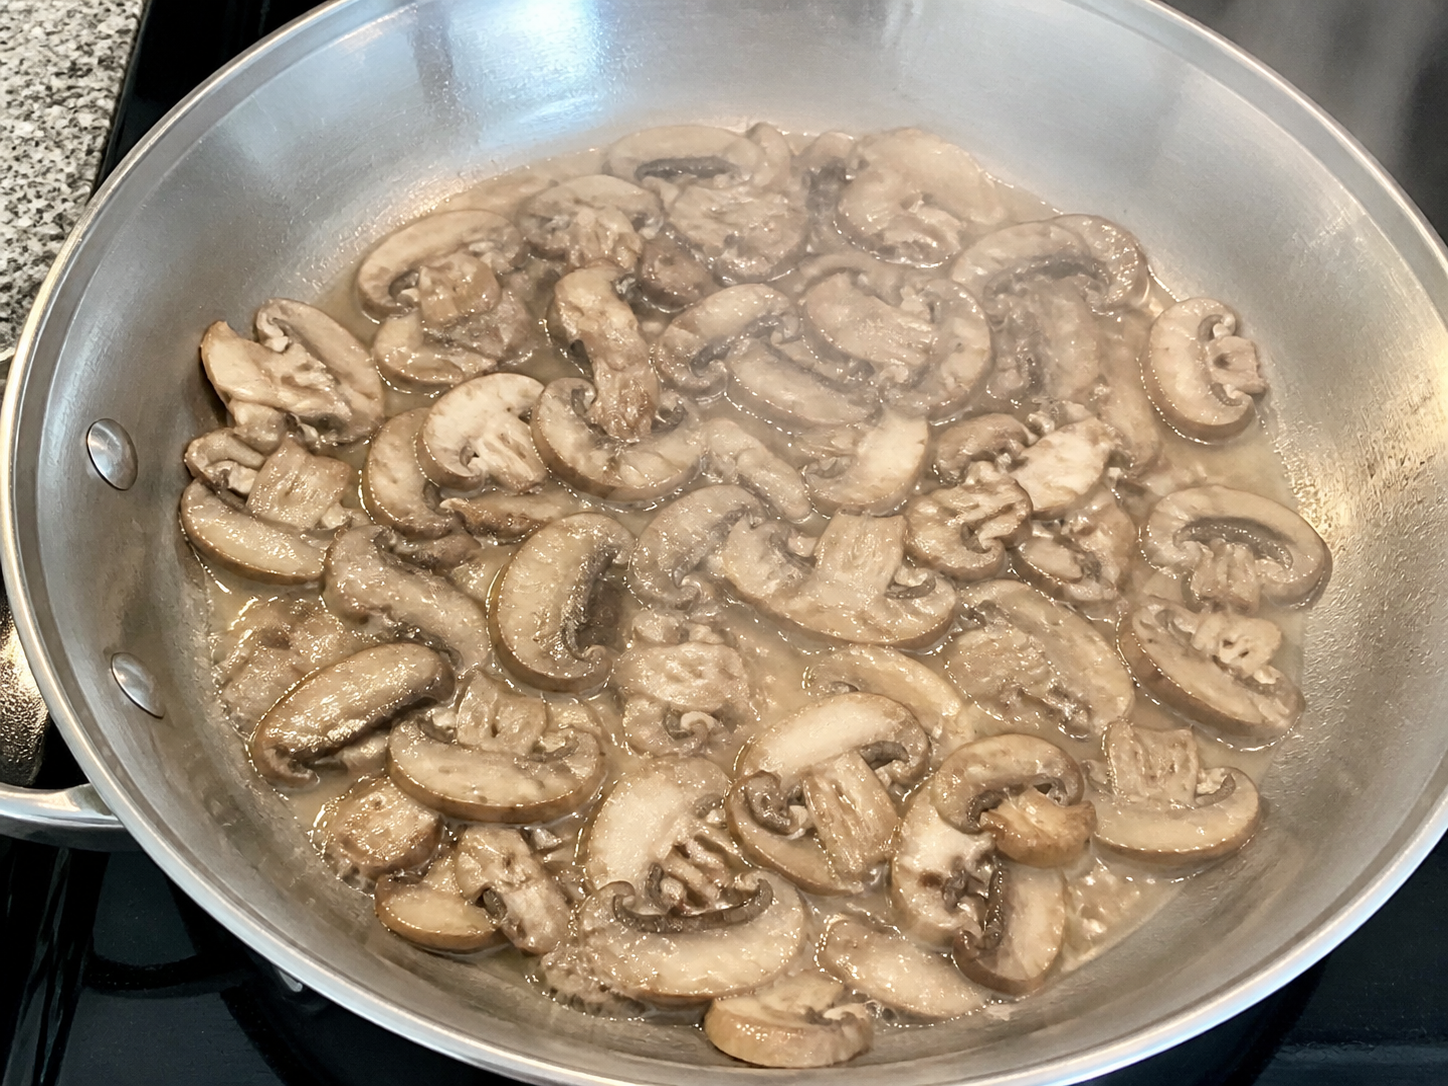
The pan cannot evaporate moisture fast enough, so the food steams.
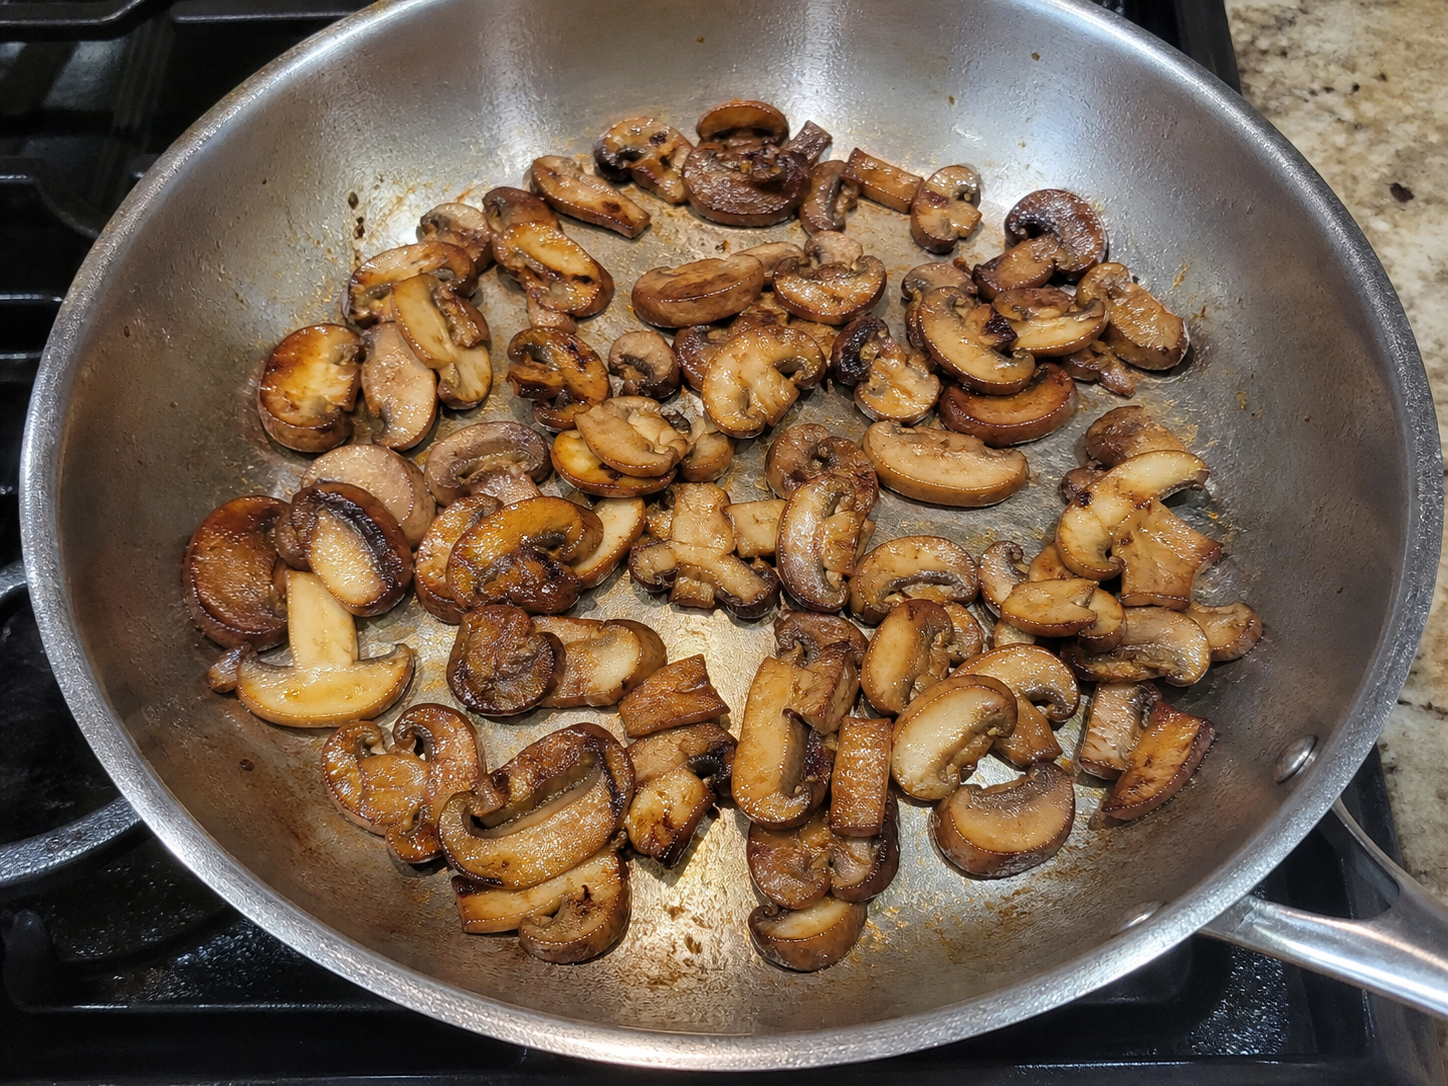
Moisture leaves steadily and the surface has enough heat to brown.
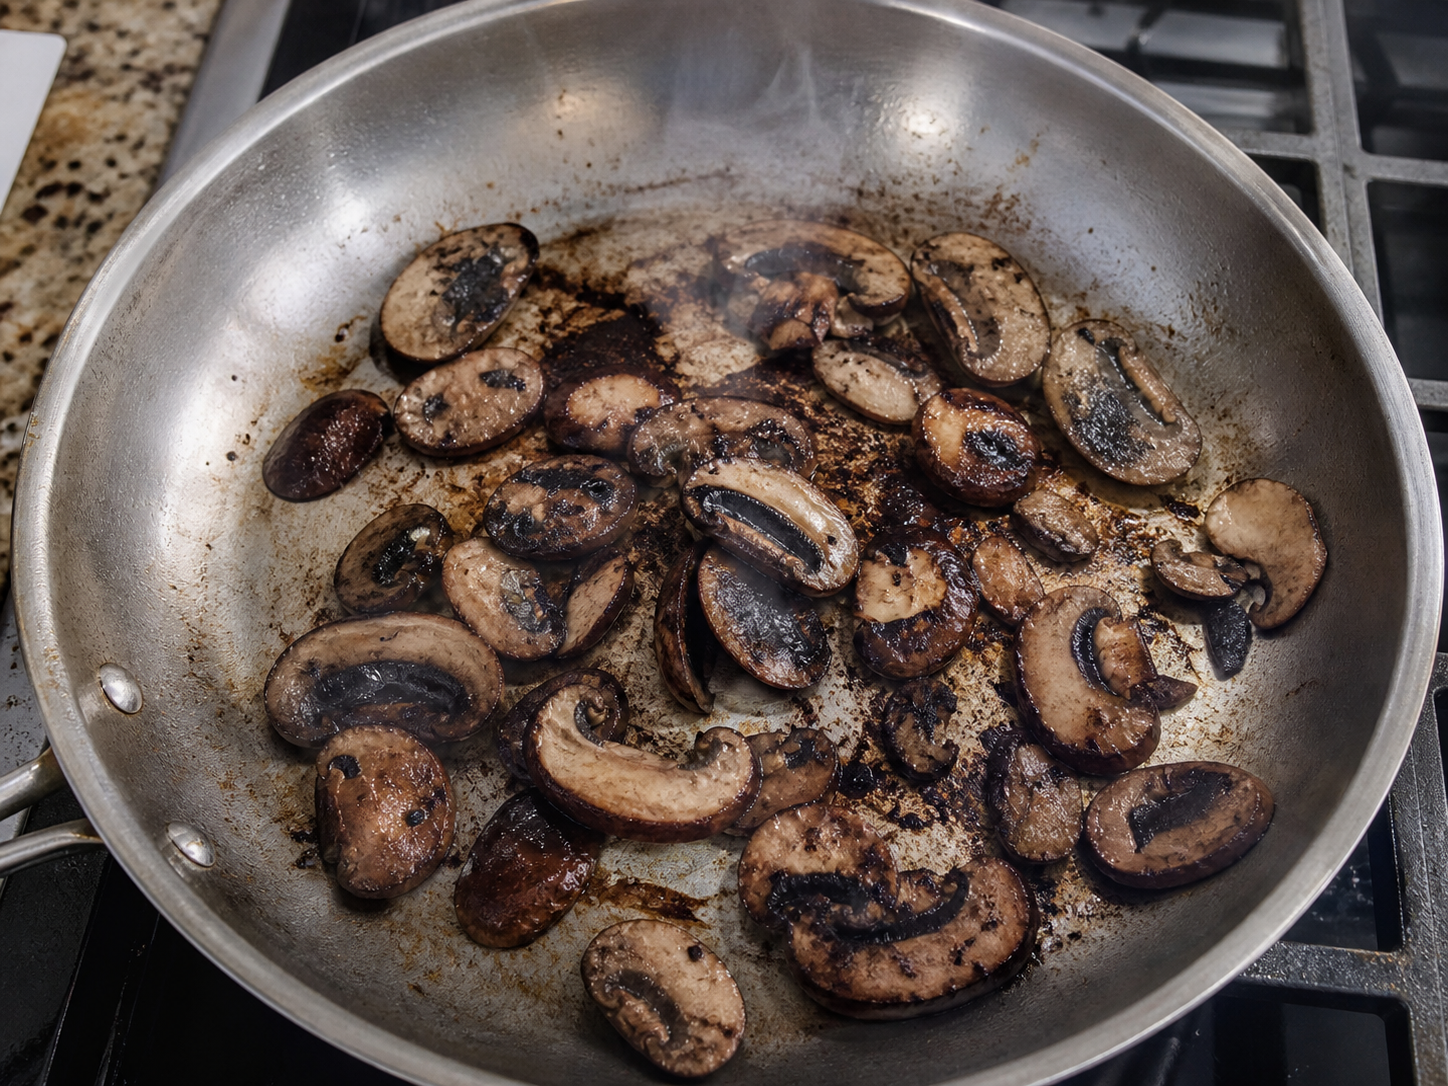
The exterior is burning before the interior can cook evenly.
Low
Quiet or very gentle bubbling, slow softening, little browning. Useful for eggs, melting, and holding food warm.
Medium
Steady soft sizzle, gradual color, manageable steam. A flexible starting place for everyday skillet cooking.
Medium-high
Lively sizzle and faster browning without immediate smoke. Useful when you want color and can pay attention.
High
Fast, aggressive heat. Useful for boiling water or brief specialized steps—not a shortcut for cooking everything faster.
Cook It: The Water-Drop Pan Test
Practice without risking dinner.
- Place a dry skillet over medium-low heat for one minute.
- Add 1/2 teaspoon water. Notice whether it sits quietly, bubbles gently, or vanishes immediately.
- Wipe the pan dry, raise the heat slightly, wait one minute, and repeat.
- Lower the heat and observe that the pan takes time to cool—especially if it is heavy.
- When comfortable, cook one egg over medium-low heat and listen for a gentle, not violent, sizzle.
Why It Works
Browning needs enough surface heat and a relatively dry food surface. Add cold food too early and it may stick before a crust forms. Crowd the pan and escaping moisture becomes steam, cooling the surface and turning food gray instead of brown.
A dark outside does not prove the inside is done. Strong heat can color the surface long before heat reaches the center. That is why good cooks adjust: sear, lower the heat, turn, cover, or finish more gently as the food requires.
Simmer or boil?
Bubble size and movement tell you more than the burner number.
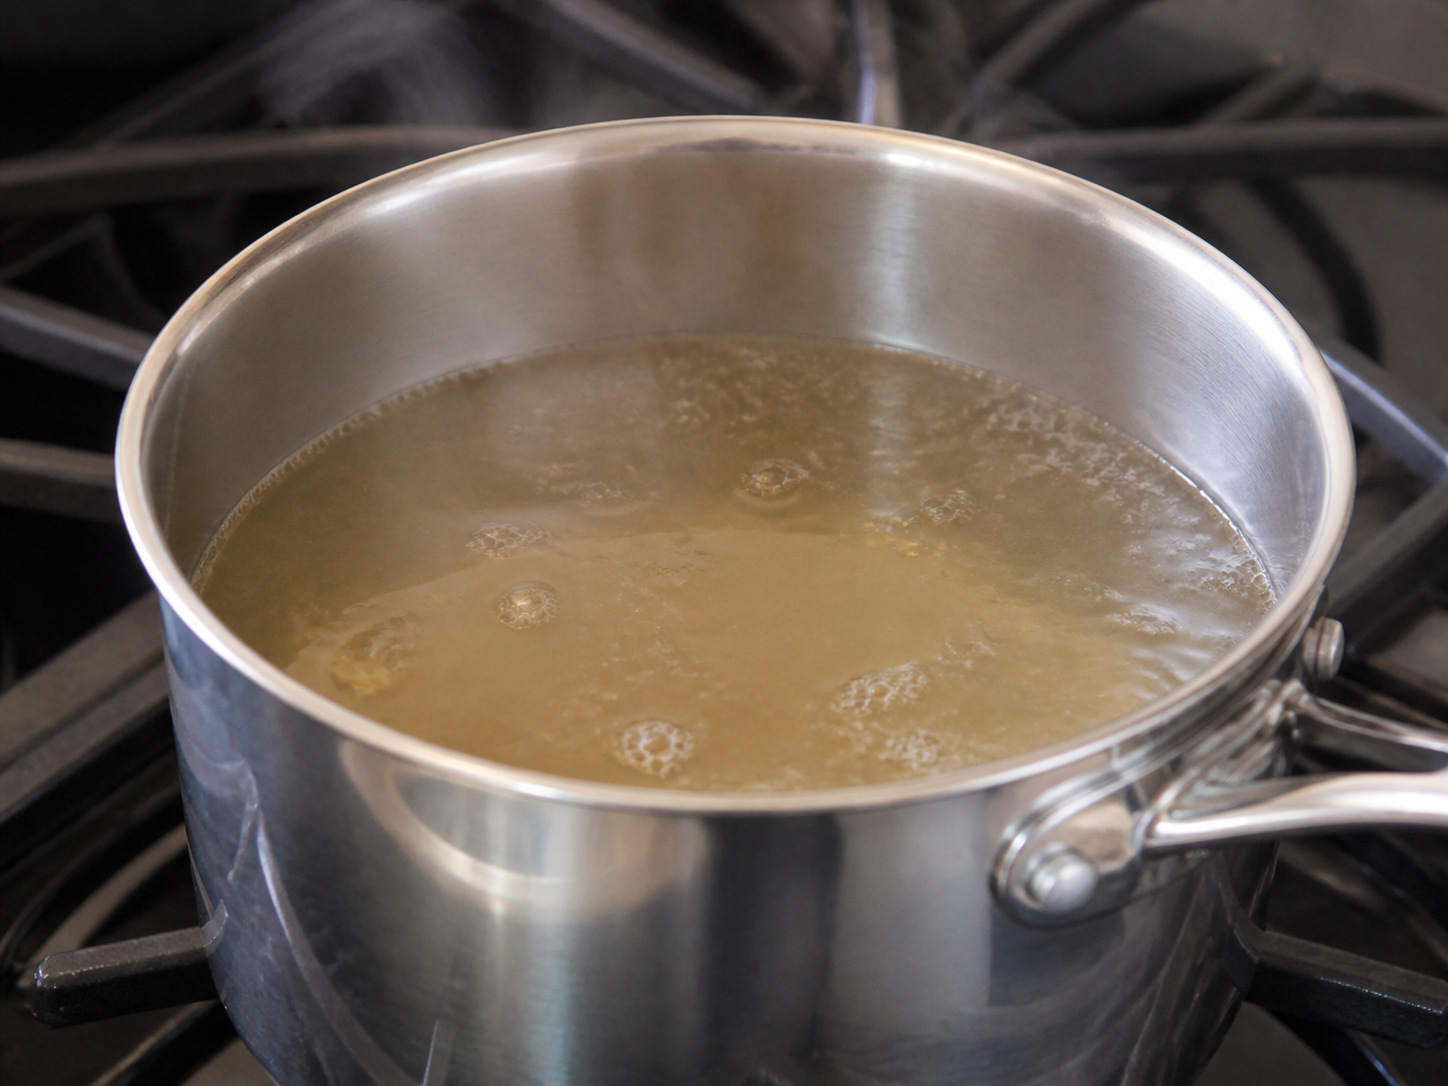
Gentle movement cooks steadily without aggressively breaking food apart.
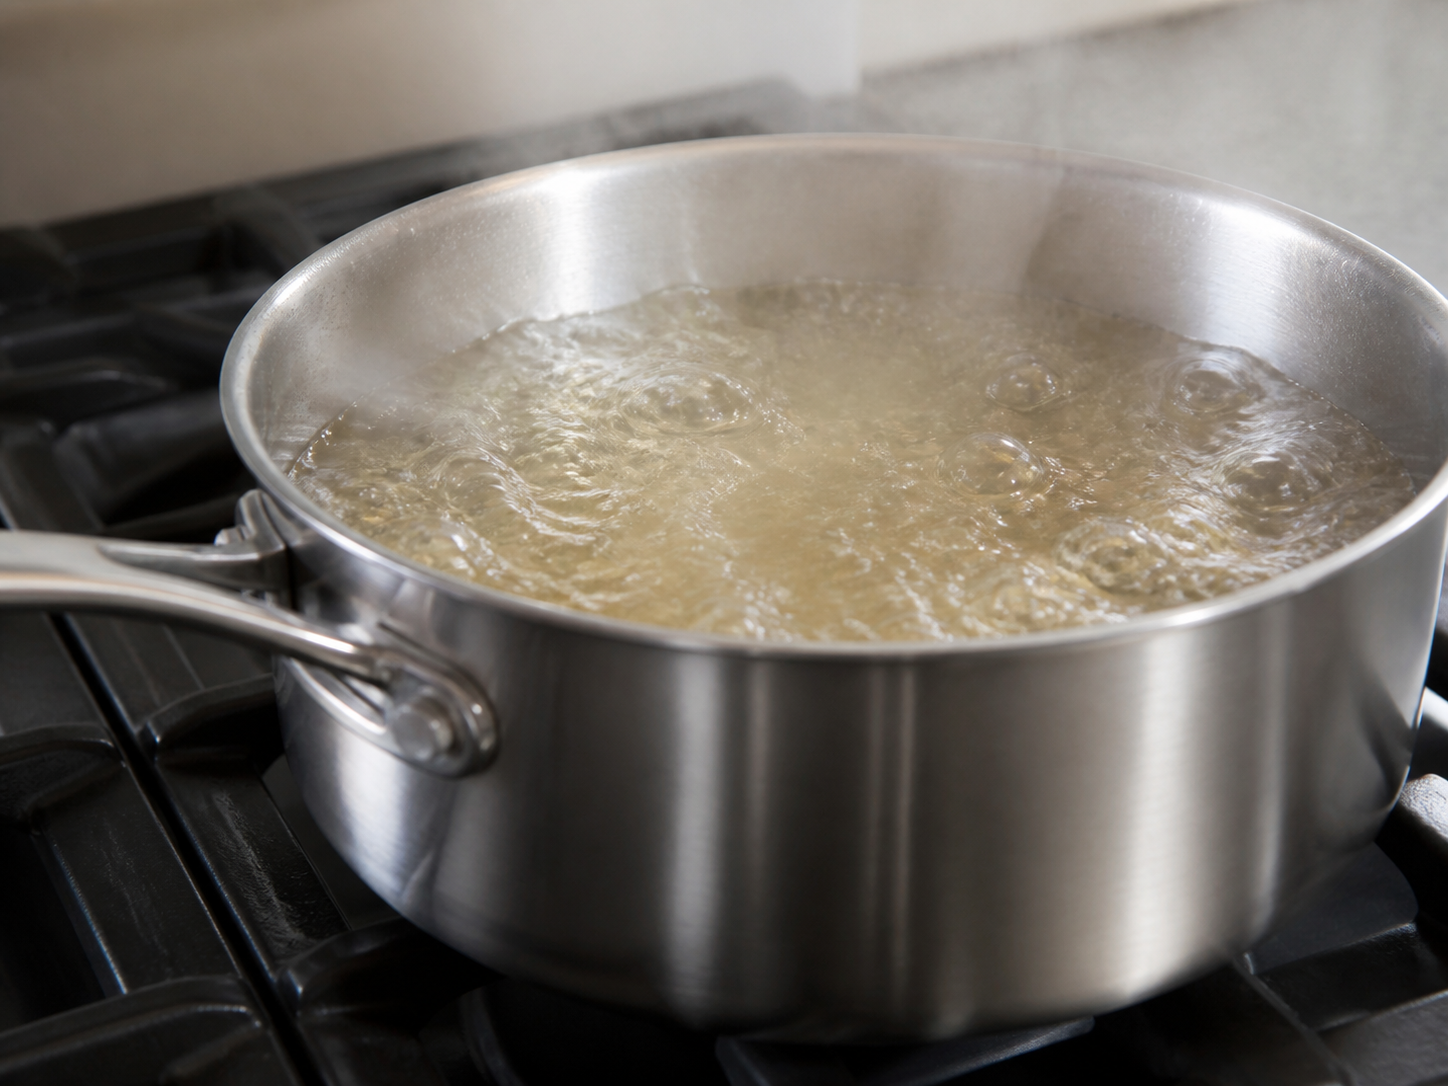
A full boil is active and useful when the recipe truly calls for it.
Give browning room
Keep the food, pan, portion size, and camera angle consistent.
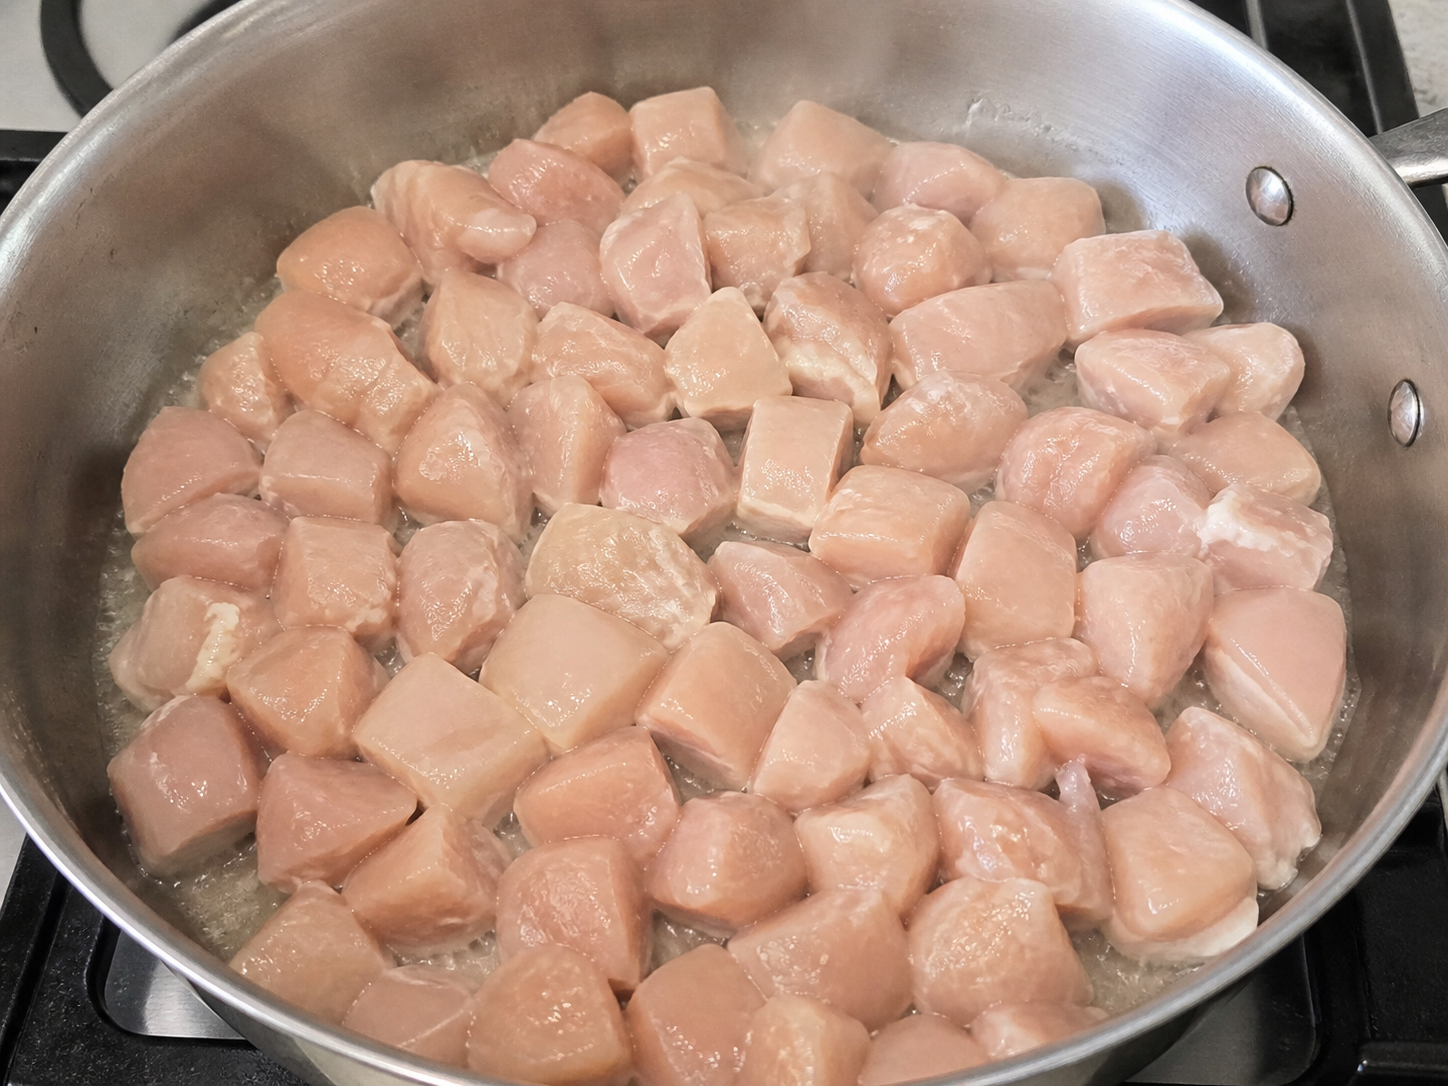
Escaping moisture is trapped, cooling the pan and steaming the food.
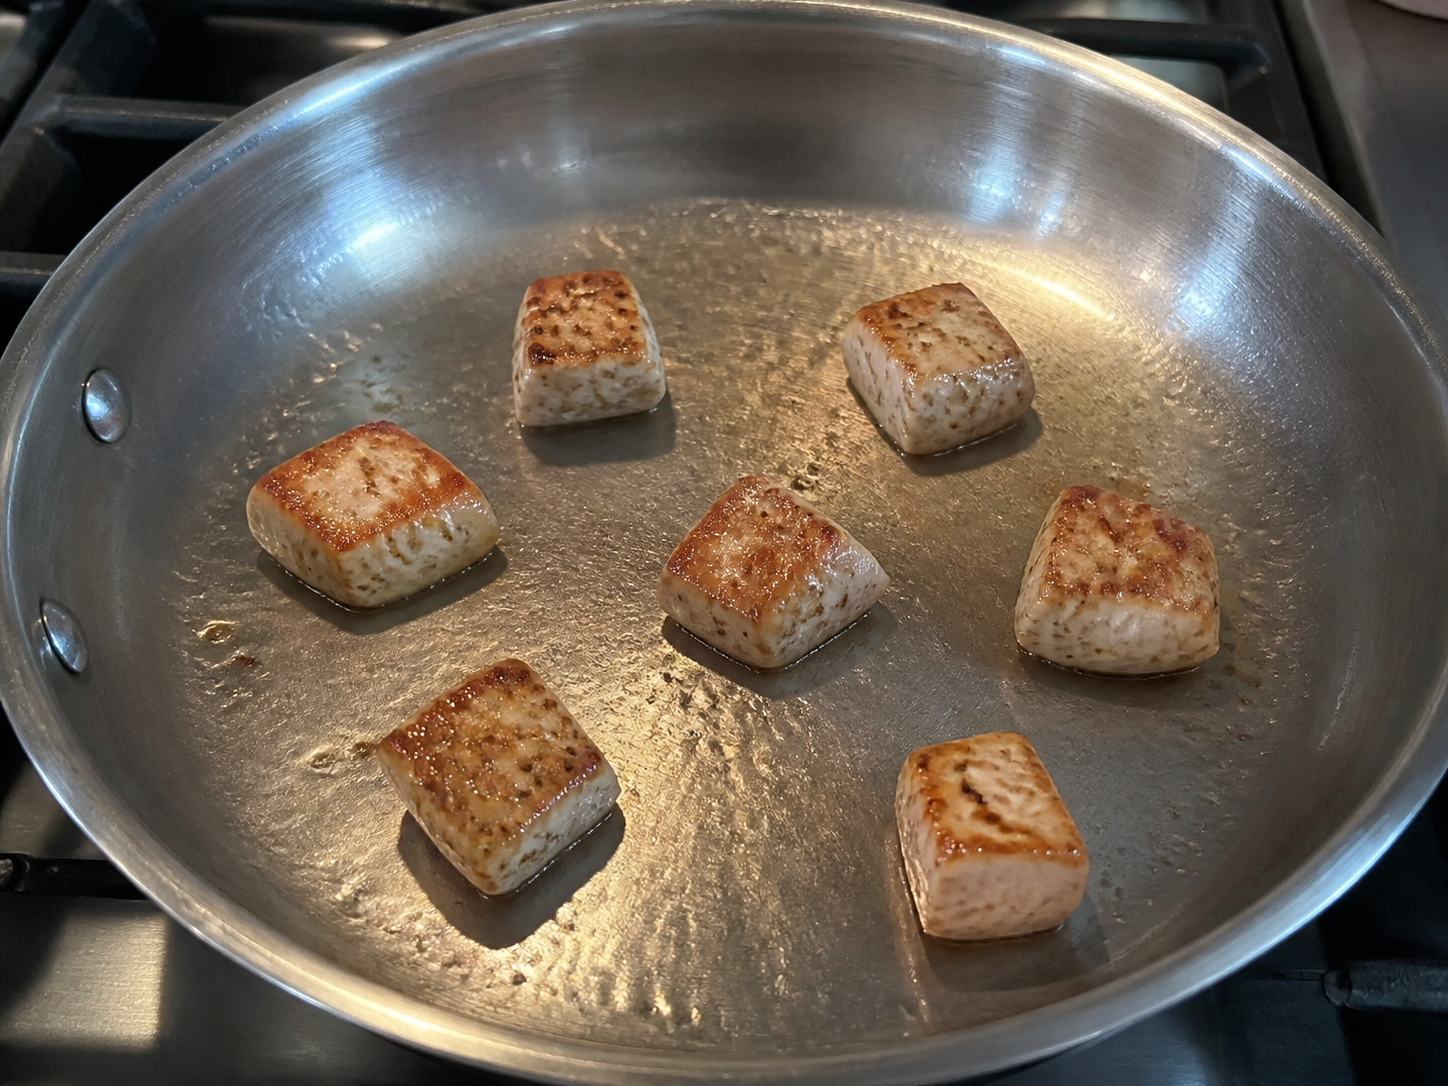
Space lets moisture escape and keeps the cooking surface hot enough to brown.
Common Mistakes
Browning has a window
Show the same food progressing in the same pan—not three unrelated results.
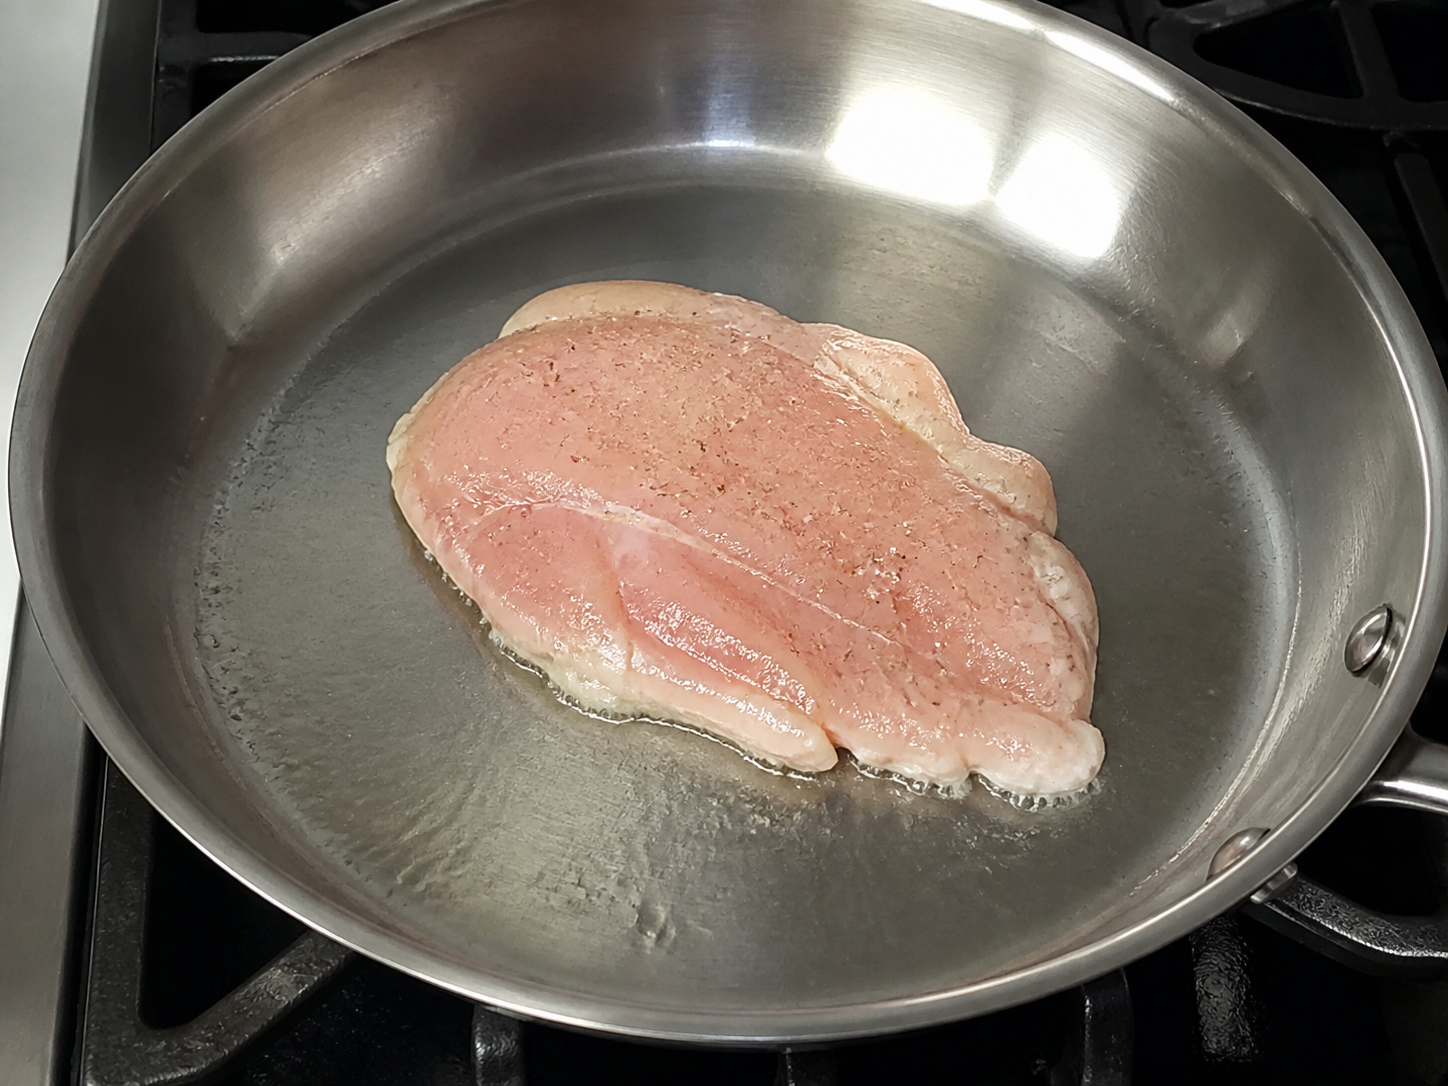
The crust has not formed. Moving it now can tear the surface.
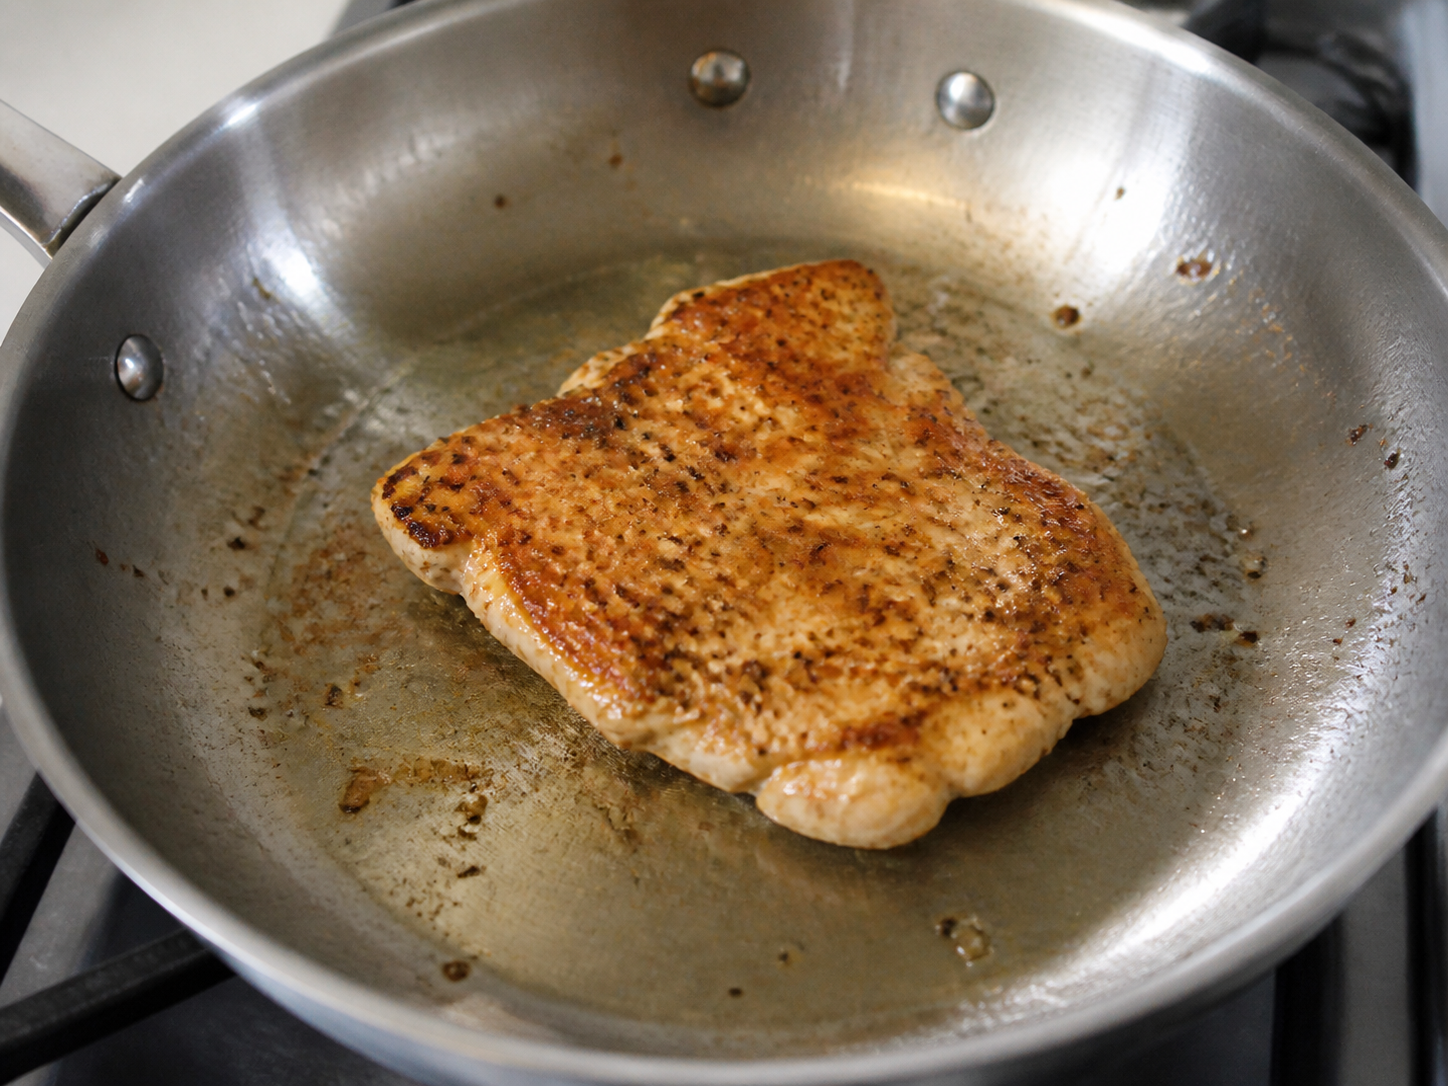
Color is even, the surface looks dry, and the food releases more easily.
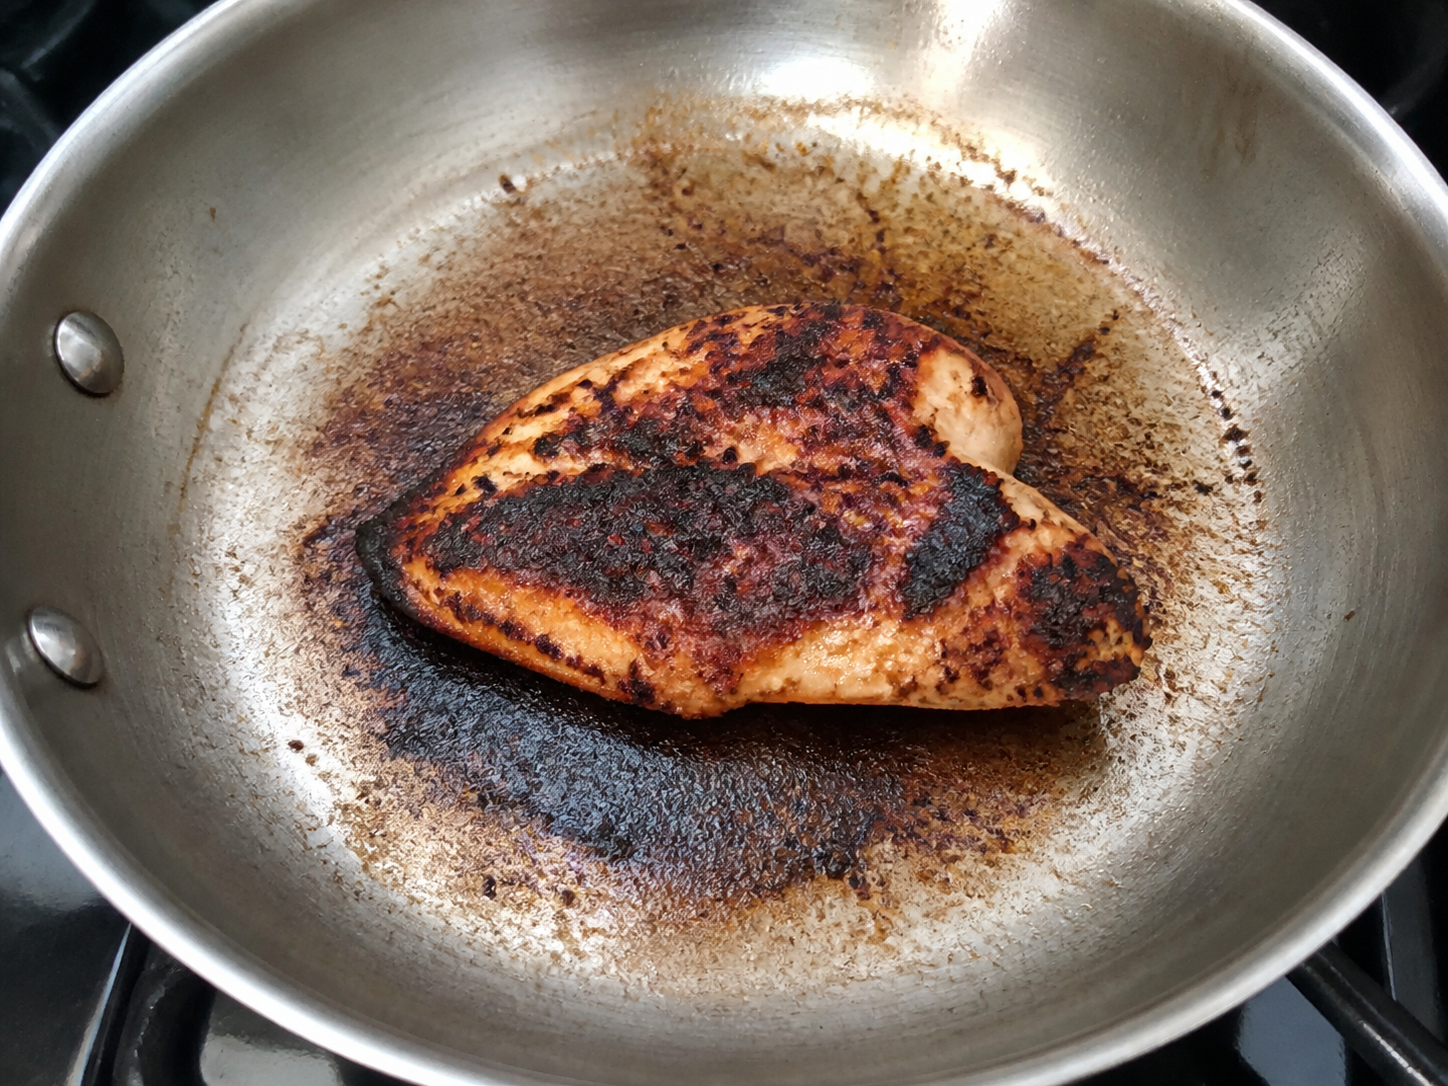
The surface has moved from browning into burning.
- Turning the burner to high because you want food faster.
- Adding food before the pan is ready.
- Overcrowding and trapping steam.
- Never adjusting the heat after food enters.
- Moving food constantly so it cannot brown.
- Treating smoke as proof that the pan is ready.
Fix It
Too quiet or gray
Give pieces space. Let moisture escape. Raise the heat one step and wait before moving the food.
Browning too fast
Lower the burner and move the pan off heat briefly. Turn the food and continue more gently.
Pan is smoking
Move it off the burner. Turn down the heat, ventilate, and let it cool. Do not add water to oil.
Food is sticking
If it is safe, wait. Food often releases after a crust forms. If it smells burnt, lower heat and loosen gently.
Try Again
Cook the same egg on another day using one small heat adjustment. Write down what changed in the sound, color, edge texture, and cook time.
Level Up
You are ready to connect heat with seasoning and tasting—the next Cooking Foundations lesson.